|
|
|
|
|
If youve come to this page, then youre probably interested in a recent project I was working on, dealing with one of my forms on various mucks and such. Anyway, below is the description that I used to base the kitbash on. For those that arent sure what a kitbash is, its where you take various toys/models, and somehow alter them to resemble something different.
Heres the description:
GryphRaptor has gone through a rather strange change. Shi has become
an elephantaur. Much like a centaur, except using an elephant as a base
instead of an equine. Hir massive lower body is that of an African elephant,
reaching a height of about 13 feet to the joint between hir morphic and
non-morphic halves, while hir length is around 15 feet. Hir thickly built
upper body is proportional to the powerful lowerbody, reaching another
12 feet into the air. Another strange change in Gryph is the fact shi's
now an albino, hir wrinkled flesh appearing pure white. As shi turns to
regard you hir colorless eyes appear pinkish, a rather startling effect
given the overall coloring of hir body. Hir powerfully muscled arms are
on the same scale as the rest of hir body. Three thick fingers and a thumb
lie on each massive hand, while hir massive legs support hir enormous mass.
Hir entire body powerfully muscled, and kept toned by exercise.
While not overly endowed, hir breasts are on par with the rest of hir
massive form, thick nipples jut outwards as hir breasts sway a bit with
hir movements. Examining hir closer you can spot the massive sheath between
hir hindlegs, the very tip of hir cock peeking out a bit, hinting at just
how large shi could be when fully aroused. Hir tail flicks slightly as
shi unconsciously shifts about, exposing both hir large tailhole, and the
pinkish lips of hir labia. When fully aroused hir cock can reach lengths
of at least 5 and a half feet and is fully prehensile as well.
Hir large head is also that of an African elephant, thick tusks jut
from the sides of hir mouth, while hir long trunk, hangs down along hir
front, curling around occasionally almost like a separate living entity.
An extremely versatile organ, the trunk is also used to trumpet calls,
pull down trees, rip off foliage, and draw up dust for dust bathing. It
is also a highly sensitive organ, which Gryph occasionally raises into
the air to detect wind-borne scents. By means of the two fingerlike lobes
on the end of the trunk and by the sucking action of the two nostrils,
Gryph can pick up and examine small objects. Massive ears flap occasionally,
reaching around 5 feet top to bottom. The large ears helping with heat
distribution in the rest of hir body.
Despite hir great weight, which averages around 24,000 pounds, Gryph
can walk almost noiselessly and with exceptional grace, hir thick columnar
legs keeping hir bulk moving forward in smooth, rhythmic strides. A thick
cushion of resilient tissue grows on the base of the foot, absorbing the
shock of the weight and enabling hir to walk high on hir hooflike toes.
Heres the breakdown of the various steps and such that went into creating the GryphRaptor Elephantaur figure:
Items needed:
1-Chyna figure
1-Toy Elephant
Several packs of ribbon putty (available through Games-Workshop, or
at least thats the only place I know of that sells this particular brand
)
Jewelers saw
Saw blades
hobby knife
pin drill
pins or small nails
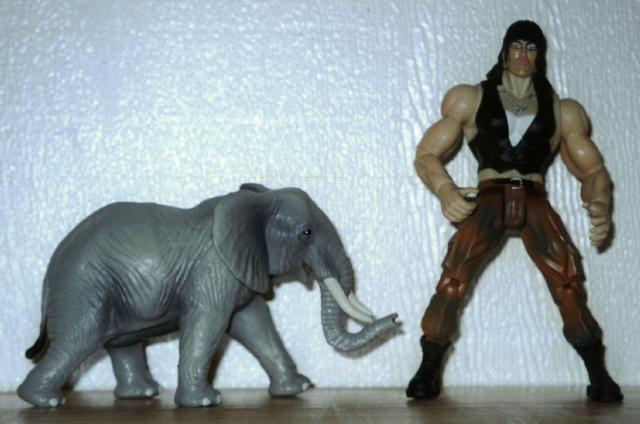
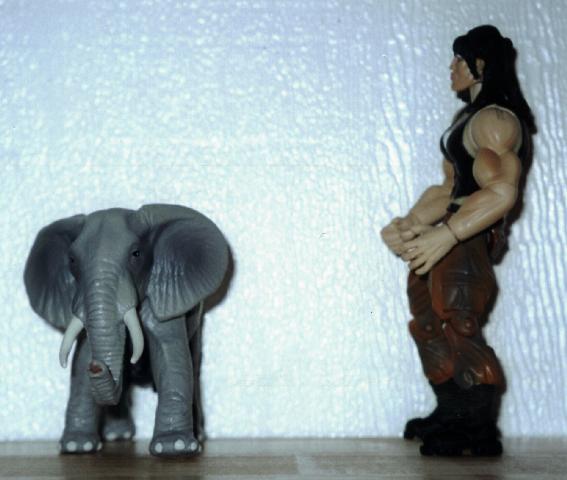
The hardest part about doing this project was finding the right sized
toys to use for the base
I was lucky to find an elephant figure at a small
toy shop that was just about the right size, to match up with a Chyna figure
Id seen at another toy shop. Figures 1 and 2 show both toys, next to
each other.
|
|
|
|
|
|
As you can see from the above pics, both figures are just about the right size compared to each other to work very well once combined into the elephantaur figure that was the goal of this project.
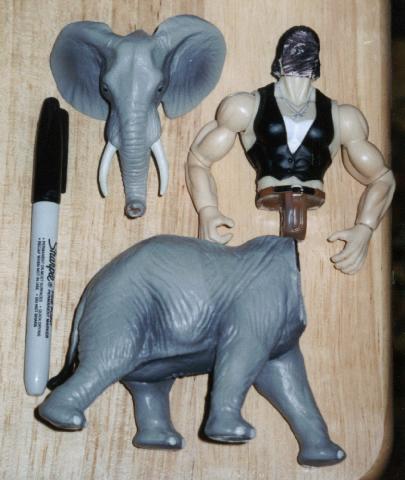
The next step was to cut apart the figures, removing the elephants
head, Chynas legs, and altering both toys so that they would hopefully
fit together fairly well
As you can see in figure 3, all the pieces have
been prepared, and a sharpie pen used to show scale somewhat. Ive also
marked the places where the model will be fit together. While the ink was
still wet, I pressed the parts against each other to mark where I wanted
each piece to fit.
|
|
|
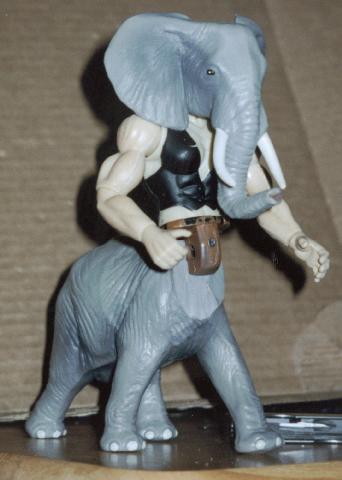
After that, I drilled holes through the various pieces, so that I could
pin the model together for extra strength. You can see where Ive placed
the pins in the next two pics. The pins allowed me to actually see how
the model would look, so I could then do any alterations on positions and
such before actually using the putty to connect everything together.
|
|
|
|
|
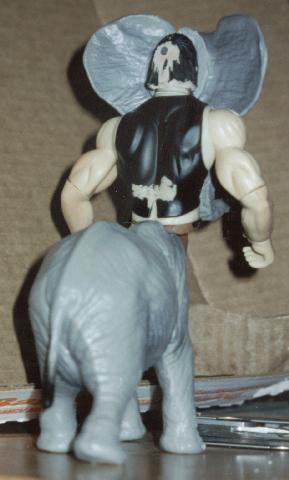
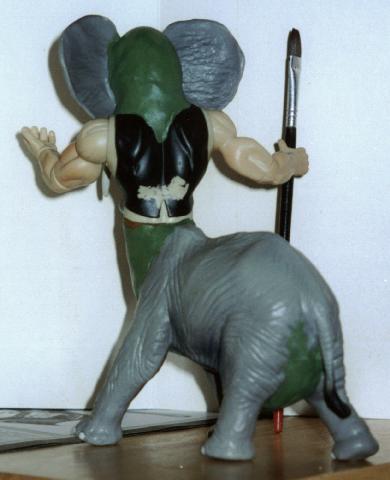
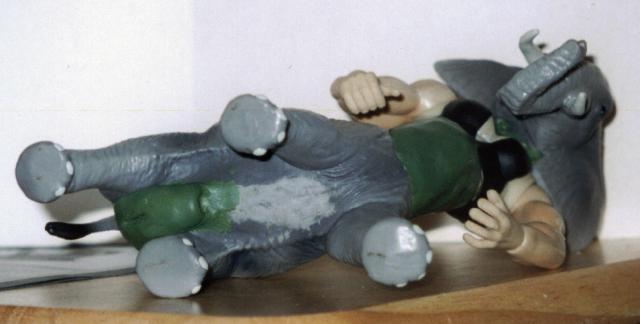
Once I was satisfied with how the figure would look, I then began the task of using putty to hold everything together, and blur the lines between the connections of the two figures. If youve never used ribbon putty in projects, I highly recommend it. It doubles as filler, and epoxy. It comes in a small pack, and looks like yellow and blue stripped ribbon. You then pull off a bit, and squeeze it together until it turns green. Then youre ready to use it on whatever. Theres about 5 minutes of time before it hardens and becomes unworkable, but you can definitely do a lot in those few minutes before hardening.
The following pics show the figure with the putty pretty much sculpted
to how I want it to look, though unfortunately I didnt manage to get the
wrinkled look of the elephant lower body to look right on the connecting
area, so just ended up smoothing it out, same with the back of the head.
You can also see Ive tried to make the figure anatomically correct, but
due to the lack of good reference pics of elephant anatomy, I had to guess
as to just where everything should go
it turned out rather well actually
|
|
|

|
|
|
|
|
|
|
Ive tried to blend the putty to the model as much as possible, but for some reason it proved very difficult for the portion where the upper and lower torsos meet. I may try and redo that at some point in the future, but Ill probably just cover it over with some cloth or something to hide it for the time being, create sort of a casual outfit for the figure.
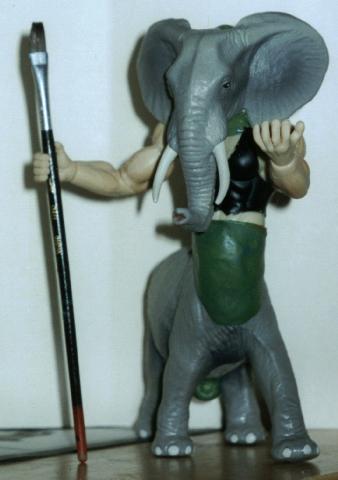
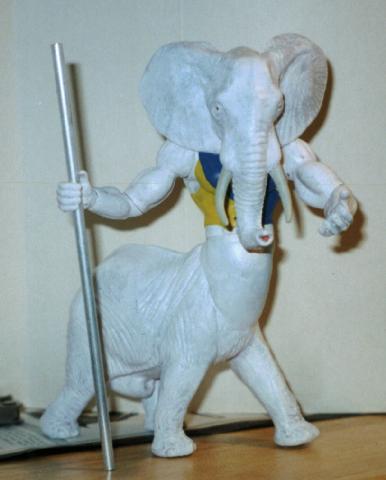
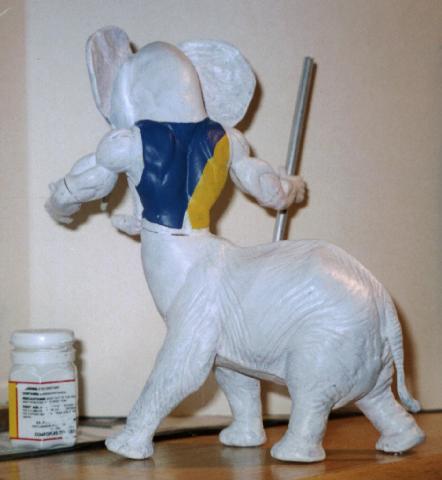
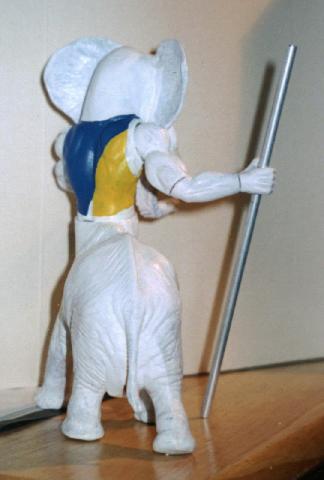
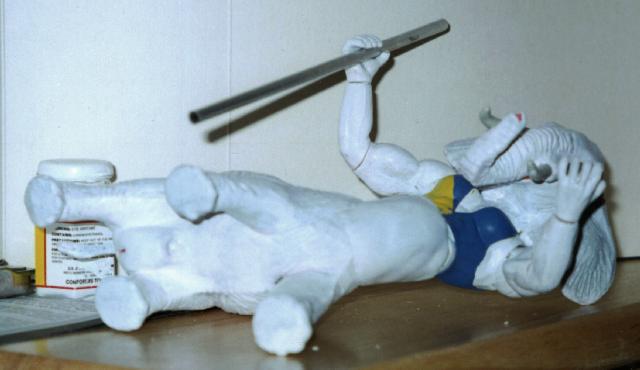
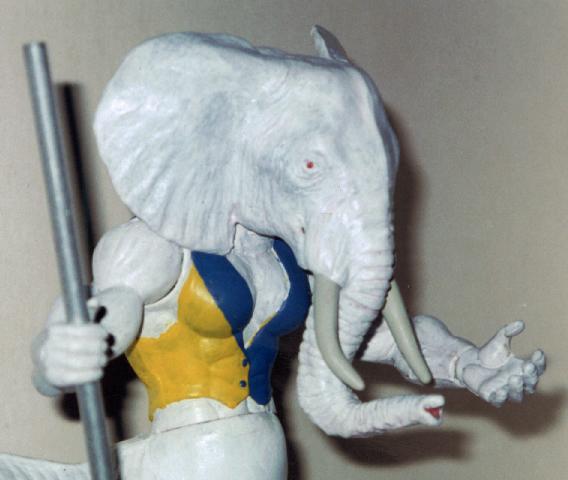
In the next batch of pics you can see that Ive painted the entire model, and come close, I think, to how an albino would look, it turned out a lot better then I expected, though I think I shouldve used a gray colored primer before actually painting, not sure how well the paint will stick to the model over time, but seems to be holding up pretty well for the time being. Just for fun, I used a small section of metal tubing I had laying around to represent a staff of some sort, and positioned the figure so it looked like shi was either barring your way, or else inviting you to join hir. I managed to keep some portions articulate, mainly the waist and arms, I wanted to be able to postion the head as well, but that didnt work out very well.
Anyway, I used a slightly thinned down white paint, to cover the body
with, after that I tried a few various ways to get a nice effect of an
albino hide. I tried a very light wash of red ink, but unfortunately that
made most of what was covered pink, which was definitely not the look I
was going for, so I painted over the areas that needed it. Luckily it seemed
that that was what was needed, as the results were closer to what Id wanted
to begin with.
|
|
|
|
|
|
|
|
|
|
|
|
|
|
There will be more information on this project, as well as some final
pics once Ive finished it fully. Like I said earlier, I want to add some
pieces of cloth to help hide some of the joins, and do a few more touch-ups
to the figure, but overall, Im pretty happy with how it looks.